Just about bordering on odd, I see things through different eyes.The heading says it all - I live, I love, I craft, I am me...
Showing posts with label How-to. Show all posts

17/11/2021

Lavender scented shower aromatherapy

 I am still reading (slowly coz only manage to dip in for a few minutes every now and then)  Simple Matters by Erin Boyle. (as I mentioned before I shopped around to find a pre-loved copy at a very nice price).
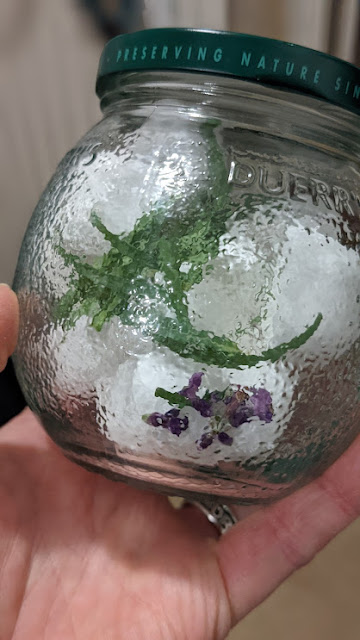
Towards the end of her book, she shares a simple tip to elevate your daily shower. I gave it a try and was really impressed and so was Himself. So much so that I have made more shower aromatherapy cubes and now have a jar full of them sitting next to the shower for us to use later tonight.


You'll only need a couple of ingredients - Bicarbonate of Soda and an essential oil or two.
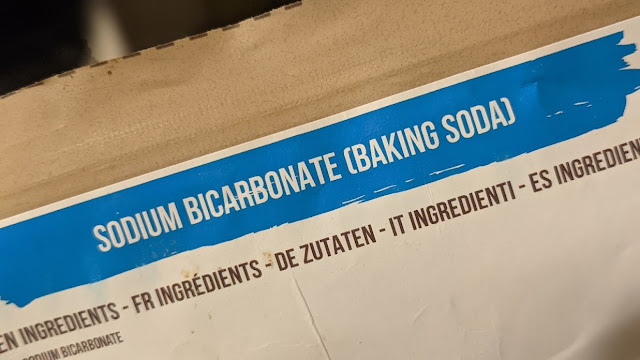
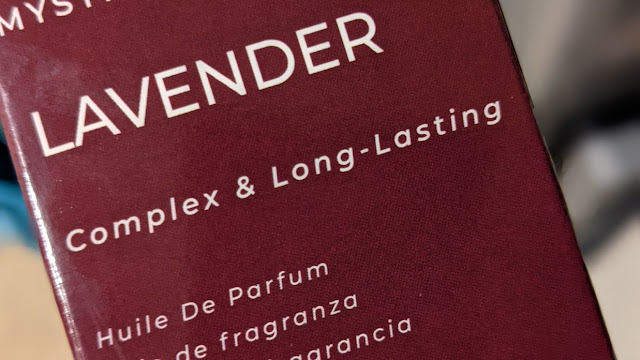
For the essential oils, Erin Boyle recommends orange and lavender - I already had the lavender so just used that and I already had a large bag of organic bicarb from our local 'green shop' in the village.
Tip the bicarb into a bowl (I did about a teacup's worth) and add water until it is soft 'sandy' paste - the wetter you make it the longer it takes to dry.

Drop the bicarb paste into a suitable container (the author recommends empty tea light foils - I used an old ice cube maker) and allow to dry. Can take up to 24 hours, I left mine near the wood burner over night and in the morning the soft paste had dried into little brickets.
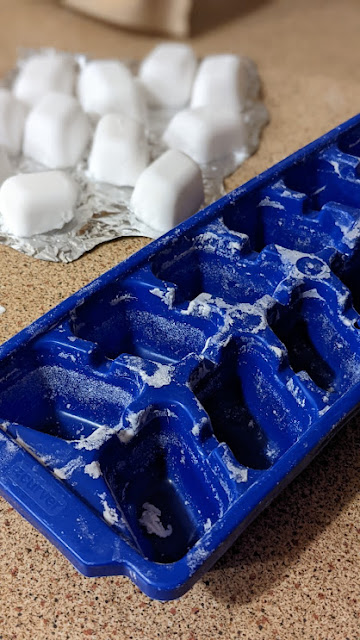
I then tipped the cubes out onto a piece of silver foil and dripped 5ish drops of the lavender essential oil on each one.
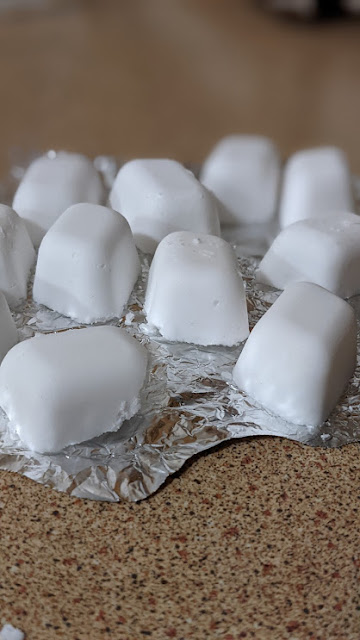
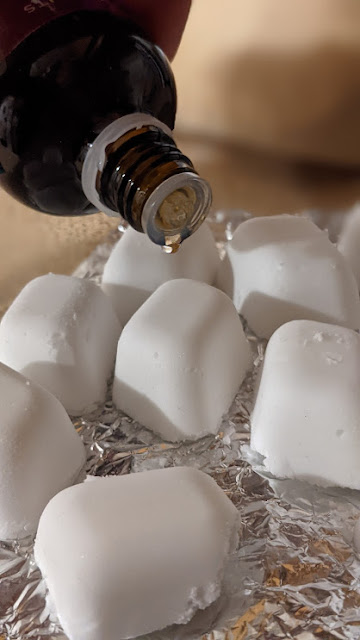
As soon as the essential oil soaked in (was in a matter of moments) I carefully put them into a jar with sprigs of fresh lavender and screwed the lid tight. 

I opened it up again a moment or two ago (about an hour after I made them) and the scent is glorious!

So, later, when I have my shower, I will take one out of the jar and put it on the floor of the bath and when the hot water hits it, the bicarb dissolves releasing the lavender scent which fills the bathroom with such a wonderfully warming and relaxing fragrance, perfect when heading to bed.

If you have small children - please make sure they don't think they are something eat and put them up high out of their reach 😊

#moreblogvember

14/09/2021

Slouchy beanie ta da and how to😊


Slouchy BLO beanie - a super simple make - fancy trying it?


Ever used the BLO stitch ? (Back Loop Only) This stitch gives this hat that ribbed look with added stretch and warmth. 
Ok - if you've never tried it - here goes a (hopefully) simple explanation.


BLO stitch

Once you have set up your foundation chain, (with an additional chain to turn) work a row of single crochet along the foundation chain, chain one, turn.
Look at your row, see the V shape made in the chains? Insert your hook through the BACK of the chain, hook the yarn, pull through and work the same stitch to the end of your row, plus one for turning.  If you are still unsure of how to do it - have a look on line - just type in 'BLO crochet stitch' and there are lots of videos and photos for both left and right hand work😊


Ok, so for the hat.....

Shorter version - I cast on 50 plus 1 (finished length 24 - 26 cm)
Taller version - I cast on 55 plus 1 (finished length 28 - 30cm)

I was using up stash yarn so it does give slightly different finished lengths but with the nature of the hat - it doesn't matter!)

Notions: I used DK (double knit) for all versions
Size 4mm hook
Tapestry needle
Scissors

BLO slouchy beanie hat

FDR : Cast the foundation row, chain 1 and turn
Row 1 :Single crochet to end, chain 1 and turn
Row 2 : *BLO to end, chain 1 and turn*, repeat** until you have crocheted sufficient width to go around head - it needs to be comfortably snug as this stitch relaxes. 

Do periodically count your stitches - I forgot and somehow lost five (??!!) and had to frog back several rows (sigh)...

Tie off and stitch the long edge together.
Using a tapestry needle, run a double thread of yarn round the top end of your hat and pull tight, weaving in all ends. I have been stitching on a badge partly for fun and partly to remind me which way round the back is 😁

To wear, I pull on until it is comfortably covering my ears and forehead then tuck the back of the hat into itself to make that lovely slouch. 

I have made three so far - mostly for work - especially as the weather starts to cool, I will use them probably most days. I did have two which I 'lived' in through January til March/April,  and they certainly got rather grubby. This time I would like to have a fresh beanie for each day.

And if you are not a beanie fan, the longer version has enough length for a generous fold up to keep that pesky chilly air out of your ears πŸ˜„

Hope you give it a try and if you do - let me know (and if you find a mistake - just shout!)


08/12/2020

S'no joke - the 'how to do' episode

Belinda from Mad Englishwoman and Dog asked for a reminder how to make paper snowflakes and while I was knitting and sipping coffee, I hatched a plan to do a quick tutorial once I'd cast off from the sleeve I had nearly finished. 

Here goes!
  • You'll need paper (I just used plain white A4, however there is no reason why you can't use metallic or patterned paper here - I would advise against using too thick a paper as it gets harder to cut once it is folded 12 times.
  • Ruler
  • Scissors * - small sharp pointed ones are best for cutting delicate detail
  • And/or a craft knife *(I use a medical grade scalpel handle and non surgical size 10 scalpel blades*
  • Cutting board
  • Pencil/pen
* the usual T&Cs - be careful with sharp pointy things etc 

To make six sided star or flake, you will need to make your A4 paper into a perfect square. 
Fold a top corner across until the edge is perfectly lined up with the diagonally opposite edge 
and flatten the fold firmly down.
Draw lightly (I've used a marker pen to make sure is visible) where the lower edge of the square is above the excess paper.
Cut off the surplus paper and save it for later.
Refold your square back into a triangle, 
then fold again into quarters.
Once again, firm down the fold to make a sharp crease.
Now here comes (in my opinion) the fiddliest part of the process.  
Turn your folded paper point down (the 90° corner)
 you need to fold the triangle into three from this point. 
I found the best way was to crease the very tip of the bottom point with my finger nail 
to help the paper bend at this point. 
Then curl the paper as if making a cone. 
Once it appears that the cone is equally curled to create three sections, 
flatten it, again making sure all sections are equally folded
and the folds pressed down as firmly as possible.
Turn your now flattened cone until the two upward pointed corners are at the back
and the flat edge is facing you. You need to cut off the pointed corners to match that edge.
Now the fun part, 
turn your triangle sideways so that the single fold is along the base 
and the double folds are at the top.
Grab your pencil and sketch out a profile - you don't need to colour in the sections to be removed, 
I did at first and it made it easier to plan, 
I have done it here to make it show more clearly.
Cut away the 'negative space' leaving your flake.
Which when opened will reveal your pattern! Voila!
You can go as complicated or as simple as you fancy - this one is a pretty simple shape, 
some I made became so intricate that I had to resort to refilling my coffee mug and falling upon a ginger and lemon shortbread to give me strength!

Oh yes ... remember that discarded and stashed for later piece of paper?

Well, just fold in half lengthways, then, as before, fold over the top corner to make a square. 
Keeping the folded edge as the centre of the star/flake (see pointed arrow)
sketch out a shape to make the top triangle as the centre of the flake 
and keep the folded edge of the long piece in the centre of the tail.
I just free cut with the scalpel blade - which is always a little risky as I can never predict the design - as it just 'happens' .
So, there you have it - this snow flake is less winter-wonderland and more snow sprite - perfect :D

Hope this helps, and if you need further inspiration and certainly better instructions and more traditional finished snowflakes - have a look HERE and HERE and HERE!


Oh well, now to start the second sleeve, excuse my while I put the kettle on, 
clear up the snow storm and cast on :)

25/01/2016

Pom pom pom tiddely pom (a bit of a How-To and Ta-Da! mix up)

Since it is still winter, 
seeing it is still grey and dreich and boring, 
conscious of a lack of colour (apart from soggy green and dank brown) in my garden 
and really feeling the need for a pop of cheerful colour ...
I had a hankering for pom poms! 
After a good rummage in my 'wip 'n left-over box', 
I found a selection of bright and jaunty colours 
(notice my predilection to my favourite shades of anything coastal).
I fancied making a rash of mini pom poms and hanging them from my Pask-tree.  
But due to my need of instant gratification - 
I had absolutely no intention of doing my pom-pom-tiddely-poms the old fashioned way - 
So I reached for a fork ...
Wrap, wrap, wrap -
 'bout 70 wraps for double knit and 100 wraps for a thinner ply. 
Snip the yarn.
Snip off another length, 
thread on to a tapestry needle and winkle through the middle teeth of the fork.

Tie tightly 
(this is where the acrylic yarn comes into its own - 
wools break too easily but yarn quite happily takes tying and tugging with no complaints)
Slip the pre-pom off the fork - now the best bit starts!
Snip, snip, snip.
Trim, trim, trim.
 Aaaah - happy :) 
It is like holding a calorie free yarn-sweet - *smile*
As I contentedly wrap and snip and trim, 
a cheerfully colourful trail of evidence from pom pom creating forms. 
Even these little snippety bits of waste wool brighten my day :)
Now, time to hang it on my Pask-tree. 
with a thin nylon 'invisible thread'. 
Carefully pushing through the pom pom and out the otherside, 
back in again...
...before tying the ends together...
... then hanging on the branch - 
to give me that desperately needed pop of colour.
Yay- feeling happy. 
Little spots of cheerful colour.
I'd made more than my little tree could hold,
so a small bouquet of pom pom flowers
seemed the perfect answer!
Using wooden skewers, pushed gently through,
no glue needed - 
means I can use both the skewer and the pom poms
 for another project on another day :)


Even better - 
more pops of colour
means
even more instant gratification
and
even more happy happy :)
Ta-Da!
PS - happy? Yup.


Himself was a little doubtful about this mad frenzy of crafting - he had a very quizzical look on his face for most of the afternoon when I was surrounded by a whirl of snipped yarn and a growing pile of pom poms. 

Once they were done - he then saw what I was trying to do, understood and accepted yet another of my little foibles - no wonder I love him so!

How are you coping with this dull and dreary weather? (we are being promised a doozy of a deluge for the next 24 hours - uh oh - better break out the waterproofs again ...)
Have you needed an emergency moment of crafting to make it better?
Have you made anything to cheer you up?

Go on share your stories, I love❤ to hear them and be inspired by your ideas :) and if you feel the need to go for a little pom-pom-tiddely-pom action - let me know, I would love to see what you do with them!

Thank you for your comments about the cake - and yes please frayed at the edge - I would love your OJ version of the recipe :) Sorry Aril and Threads Through my Life - all evidence of cake has been scoffed. Sustainablemum - you could soak your fruit in a fruit juice or a herb tea.

x❤xx❤xx❤xx❤x